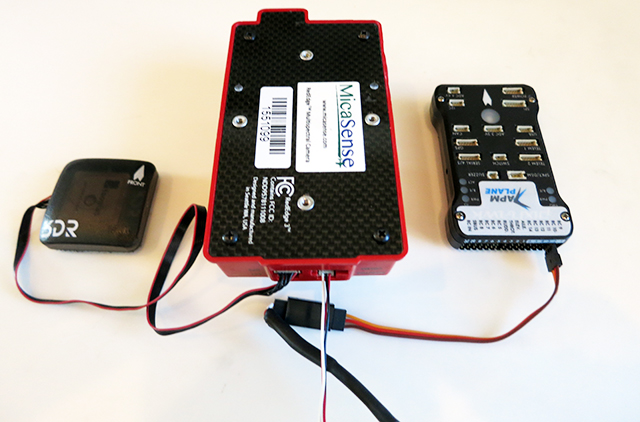
Overview
Do the following to configure a Micasense RedEdge
multispectral camera in a Tuffwing UAV Mapper.
RedEdge Setup
Requirements
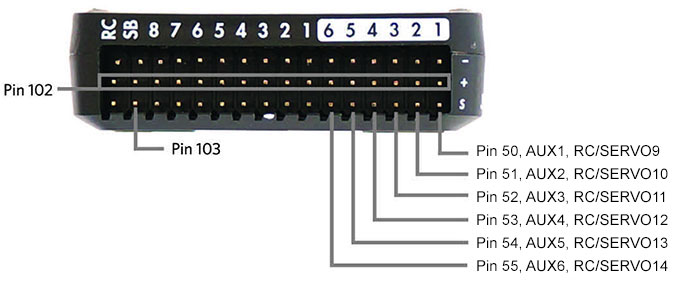
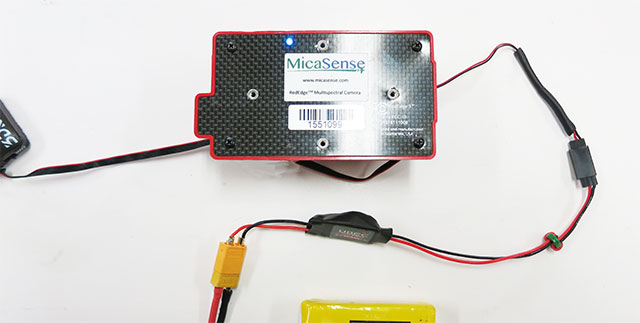
- Connect the
Tuffwing Rededge trigger cable to Pin51/AUX2/RC10 on the back of
your Pixhawk.
- You will need to provide 5 volts to the back of
the Pixhawk. The 5 amp BEC on the
Plush40 ESC has been tested.
- Rededge cameras automatically geotag images using a Pixhawk
GPS. Connect an Pixhawk GPS to the RedEdge's GPS port using its
6 pin DF13 connector.
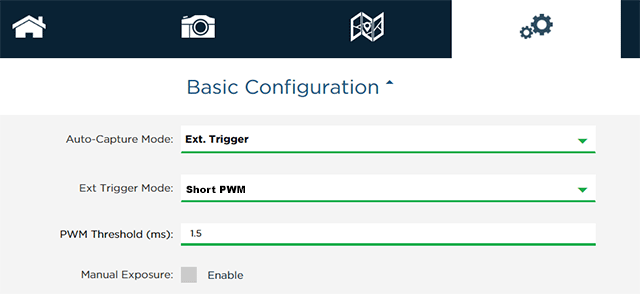
- Power up the RedEdge by plugging the servo cable into a 5 volt UBEC or ESC.
- The RedEdge will create a WiFi access point. Connect to rededge########. Password is micasense.
- Start your web browser and go to http://192.168.10.254.
- Select the Settings tab and configure your RedEdge as shown and Save.
Configure your Pixhawk
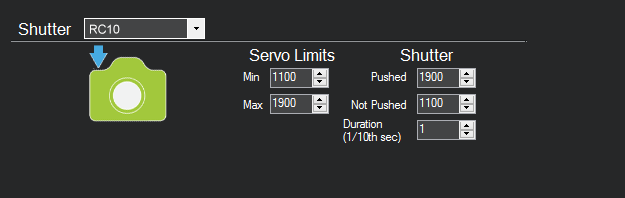
- Connect to your Pixhawk with Mission Planner and go to Initial
Setup > Camera Gimbal and set as shown
above.
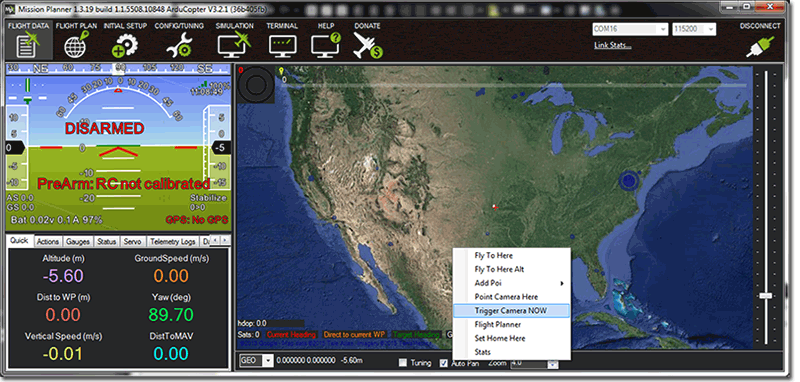
Right-click on the map and select Trigger
Camera NOW. If everything is setup correctly your Pixhawk
will trigger the Rededge to take a picture and is capable of
triggering pictures using GPS distance.
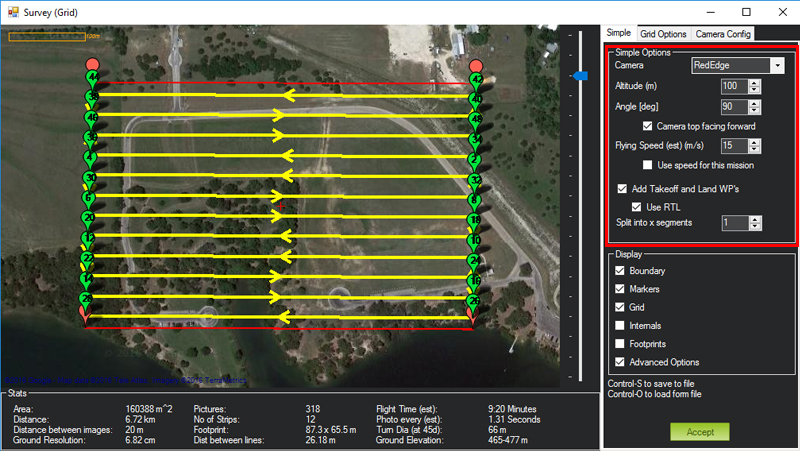
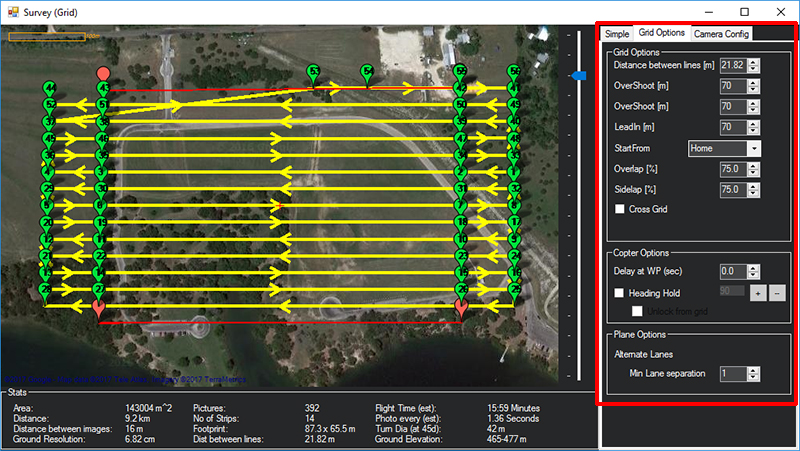
Mission Planning
- Read Best practices: Collecting Data with MicaSense RedEdge and Parrot Sequoia.
- Start Mission Planner > Flight Plan
- Right-Click > Draw Polygon > Add Polygon point. Create a polygon around the survey area.
- Right-click > Auto WP> Survey (Grid)
- On the Simple tab select:
- Camera: RedEdge
- Altitude (m): 100
- Camera top facing forward
- On the Grid Options tab set:
- Both Overshoot [m]: 70
- LeadIn [m]: 70
- Overlap% [m]: 70
- Sidelap% [m]: 70
- Set Min Lane separation to 1
|