Overview
Do each of the steps below in sequence to configure your Pixhawk,
RC transmitter and servos.
Mission Planner is the ground control station and
configuration utility for your UAV Mapper. It is compatible with Windows
only.
- Download and install the latest version of Mission Planner.
Note: Complete Mission Planner
documentation
here.
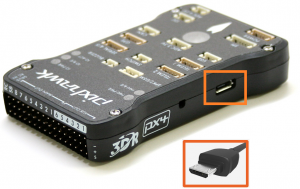
- Connect your Pixhawk to your PC using a Micro USB cable.
- Start Mission Planner and select your Pixhawk from the drop down list. Do not press
the
Connect button.
- Select INITIAL SETUP > Install Firmware.
- Select Arduplane and follow the onscreen instructions to
complete the firmware installation.
- Download the UAV Mapper Pixhawk
parameter file. [Requires Arduplane 3.8.x]. If it opens as a text file then Right-click > Save
as > UAV_Mapper.param. (Delete the .txt extension).
- Connect in Mission Planner and go to CONFIG/TUNING >
Full Parameter Tree.
- Select Load From File and open UAV_Mapper.param.
- Select Write Params to copy the parameters to
your Pixhawk.
Follow these steps to calibrate your accelerometer:
http://plane.ardupilot.com/wiki/common-accelerometer-calibration/
Follow these steps to calibrate your compass:
http://plane.ardupilot.com/wiki/common-compass-calibration-in-mission-planner/
-
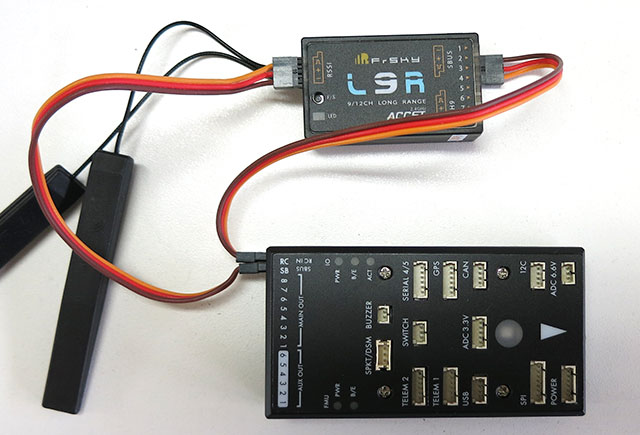
Use servo cables to connect:
- SBUS on L9R to RC IN on
Pixhawk.
- RSSI on L9R to SB on Pixhawk.
-
Download the UAV Mapper Taranis model
file. Copy the file to ../MODELS/ folder on a MicroSD card and
insert it into your X7 MicroSD card slot.
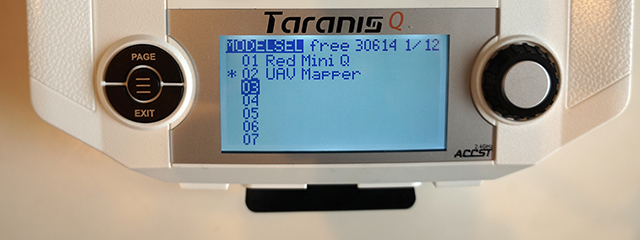
- Power up your X7 and press the Menu button.
- Navigate to MODELSEL and use the right
Scroll-Wheel button to select an empty model.
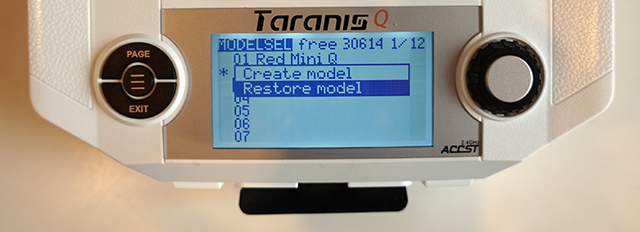
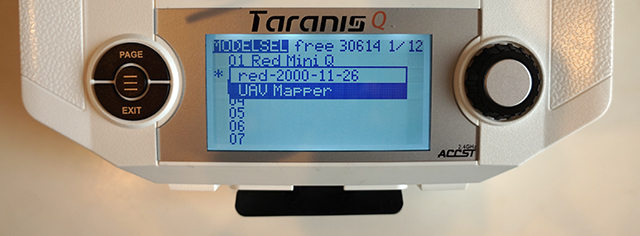
- Press the right Scroll-Wheel button and select Restore model.
- Then select UAV Mapper.
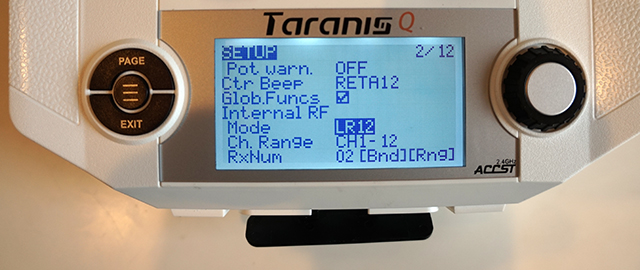
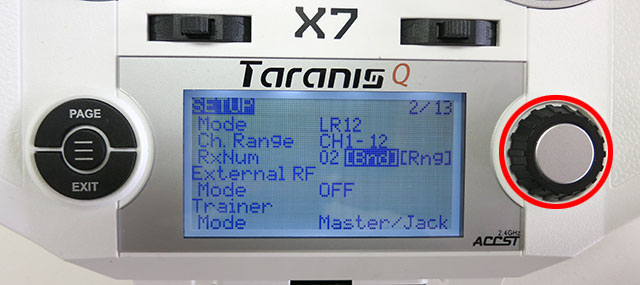
- Press the Page button until you reach the SETUP page.
Select LR12 for Mode.
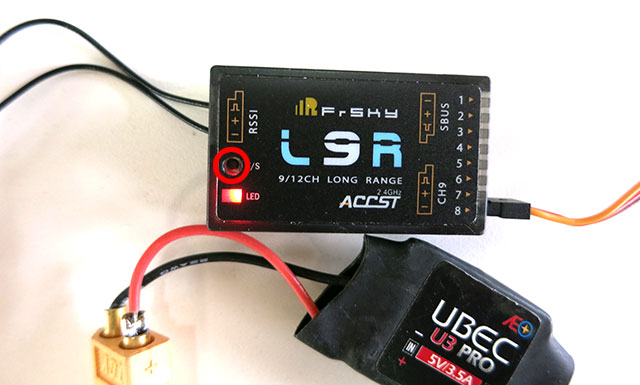
- Select Bnd to bind your X7 transmitter to your L9R receiver.
- Power your L9R receiver while pressing the F/S button. The LED
will flash green.
- Then press right scroll wheel to confirm the bind.
Set Receiver Failsafe
Important: You must set RC receiver failsafe to No pulses on lost
signal. Failure to do so will cause the RC receiver to hold the last
position before signal was lost - which may cause a dangerous
fly-away or crash. Do the following to
set "no pulse on lost signal:
- Turn off your Taranis RC transmitter then power your L9R
receiver.
- Quickly press the F/S button on your L9R. The LED will flash
green.
- Use Mission Planner > Initial Setup > to verify you have properly set No
Pulse failsafe on your L9R.
- With RC Transmitter on your Radio 1 and 2 values will be near 1500.
- Turn off your RC transmitter. Values must drop to 0 [No Pulses].
Configure RSSI
The L9R outputs Received Signal Strength Indicator (RSSI) that can
be input into the Pixhawk and displayed on the Mission Planner HUD
screen.
- Go to Mission Planner > Config >Tuning > Full Parameter Tree and set:
- RSSI_ANA_PIN to 103
- RSSI_PIN_HIGH to 3.3
- RSSI_TYPE to 1
- Start Mission Planner and right-click on the
HUD > User Items > check rxrssi to
display your L9R receiver signal strength.
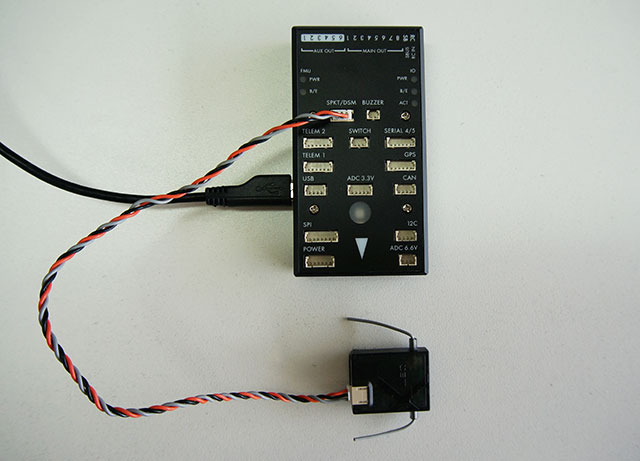
Your Spektrum transmitter communicates to the
Pixhawk with a Spektrum satellite receiver. You can bind the satellite using Mission Planner.
- Connect your satellite receiver to the SKT/DSM port on your Pixhawk.
- Connect a USB cable to your Pixhawk and PC running Mission Planner.
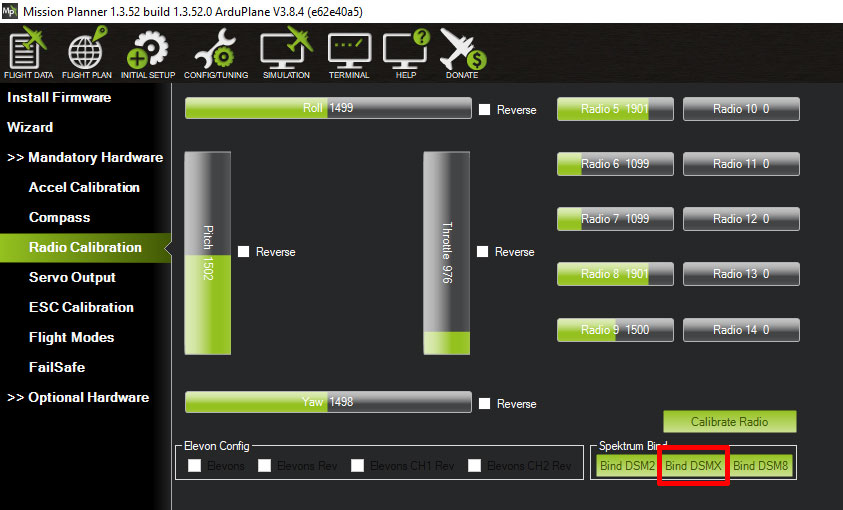
- Start Mission Planner and go to INITIAL SETUP > Radio Calibration.
- Select the Bind DSMX button. The orange LED on
the satellite will flash.
- Power up your Spektrum transmitter while holding the
Bind button.
- The orange LED on the satellite will turn solid signaling bind
is complete.
Create a new model with NORMAL wing type in your transmitter
Elevon mixing is handled by the Pixhawk. Create a new model with NORMAL
wing type (no elevon, aileron, or flapperon mixing).
- Press the Scroll Wheel and turn on your transmitter.
- Select Model Select and choose a new Acro model.
New Acro models use NORMAL wing type by default.
- Click the Back button twice to exit system setup.
Set RC transmitter servo direction
- Power up your RC transmitter.
- Hold the Scroll wheel
and select Servo Setup.
- Scroll to
Reverse.
- Scroll to Aileron and
Elevator and change them to Reverse.
-
Press the Back button to exit.
Set the Flight Mode switch
- Hold down the Scroll wheel and turn on your transmitter.
- Select Channel Assign.
- Scroll to and select NEXT on the RX Port Assignment page.
- On the Channel Input Config page scroll to
7 AUX2 and change it to D.
- Click the Back button twice to exit system setup.
- You have now assigned the D Switch to channel 7. You will configure your Pixhawk to change flight modes using your
D Switch.
The Spektrum DXe requires a special
programming cable and
software to configure.
- Download and install the Spektrum DXe
programming software and connect to your RC transmitter.
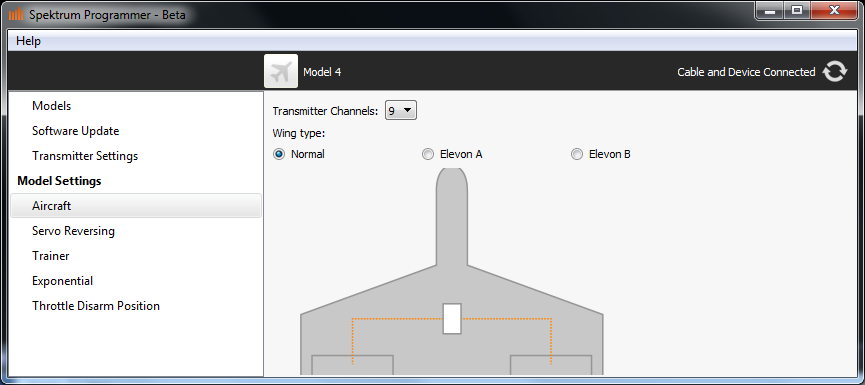
- Set Wing type to Normal.
- Set Transmitter Channels to 9.
- The 3 position Flap/Gyro switch will be your Flight Mode switch.
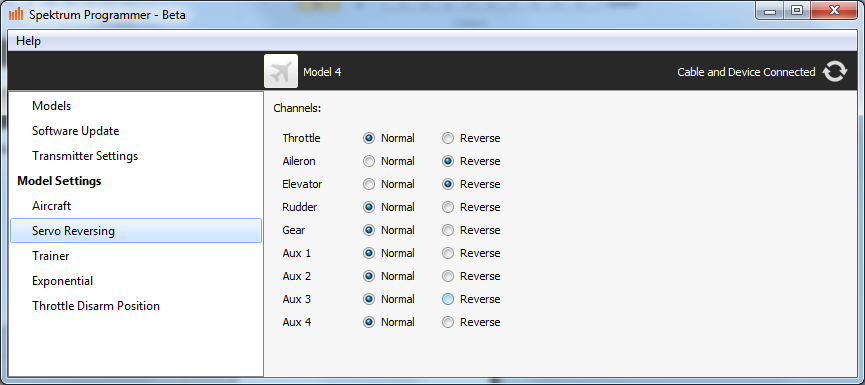
- Reverse Aileron and Elevator.
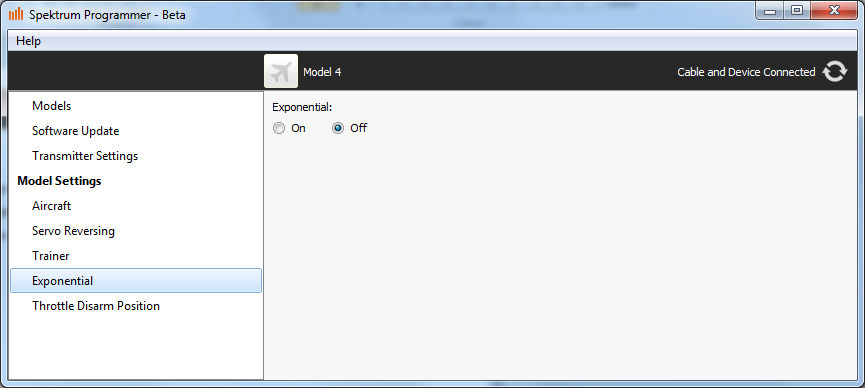
- Set Exponential to Off.
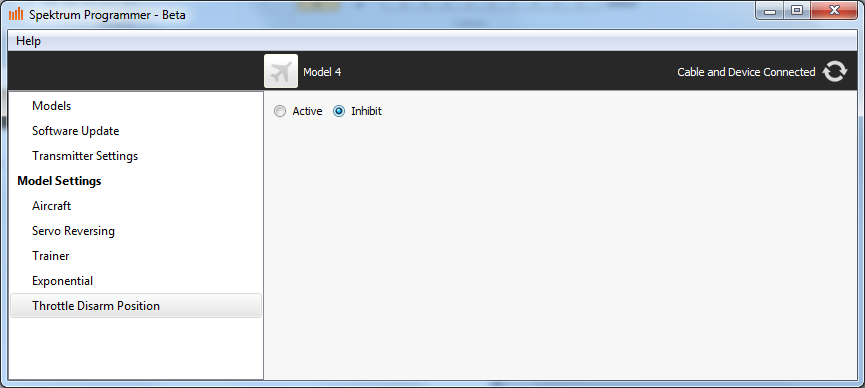
- Inhibit Throttle Disarm.
- Set flight mode to Manual and ARM your UAV Mapper. [Remove propeller]
- Center RC transmitter trims.
Important: You do not ever need to "Trim" your UAV
Mapper. Just get the elevons close to centered and the Pixhawk will
automatically keep the UAV Mapper flying level. Adding trim will
make the Pixhawk think you're trying to "nudge" it and cause it to
fly off course.
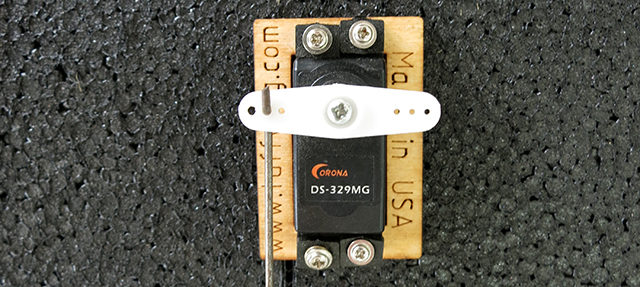
- Remove the servo arms from the servos and position them so they
are at a right angle from the control rod. The servo arms
are not centered on the splines. You can rotate them to achieve a
near perfect right angle from the pushrod. Add blue thread lock to servo arm screw and tighten.
- Widen the center hole in the servo arm with a 1/16" drill bit.
Install the pushrod as shown.
- Raise the elevons 1/8" up from relaxed position (as cut from the
foam) and tighten
brass quick connect hex screw.
Important: Use
thread lock on the servo arm screw.
Your Pixhawk uses the same servo throw distance and
center position you have
programmed in your RC transmitter. You must perform a Radio
Calibration so your Pixhawk will have those settings.
- Remove your propeller and power up your UAV Mapper.
- Start Mission Planner and connect.
- Go to INITIAL SETUP > Mandatory Hardware > Radio
Calibration.
- Select the Calibrate Radio button.
- Set Pitch and Roll (right stick) trims to center.
- Set throttle
trim to low.
- Move sticks in all corners then return sticks to center. Your
values should be with in 50 of the following:
- Pitch and Roll Low: 1100
- Pitch and Roll Center: 1500
- Pitch and Roll High: 1900
- Throttle high: 1900
- Throttle Low: 1000
The values above are
standard RC servo 100% travel. If necessary use your RC
transmitter's End Point Adjustment to reduce or
increase the PWM values.
Note: Do not use your RC
transmitter's trim button after performing a Radio Calibration. This
changes the "center" stick position and the Pixhawk will think your
trying to "nudge" the plane. This will result it flight lines offset
from waypoints, roll turning during take off, and other undesirable behavior.
Errata, kudos, brian.christal@gmail.com
Continue to UAV Mapper User's Guide >>
|