Overview
To add geotags to your GoPro images you'll need to
set your GoPro's time to GPS time, setup and fly a mission with your
Pixhawk based UAV while taking pictures with your GoPro, then add geotags to your images using
Mission Planner.
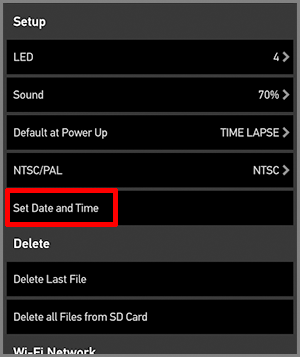
Set your GoPro time to GPS time
The minutes and seconds on your phone time are automatically synched to GPS
time. Do the following to synch your GoPro's minutes and seconds to GPS time.
Setup and fly a mission
-
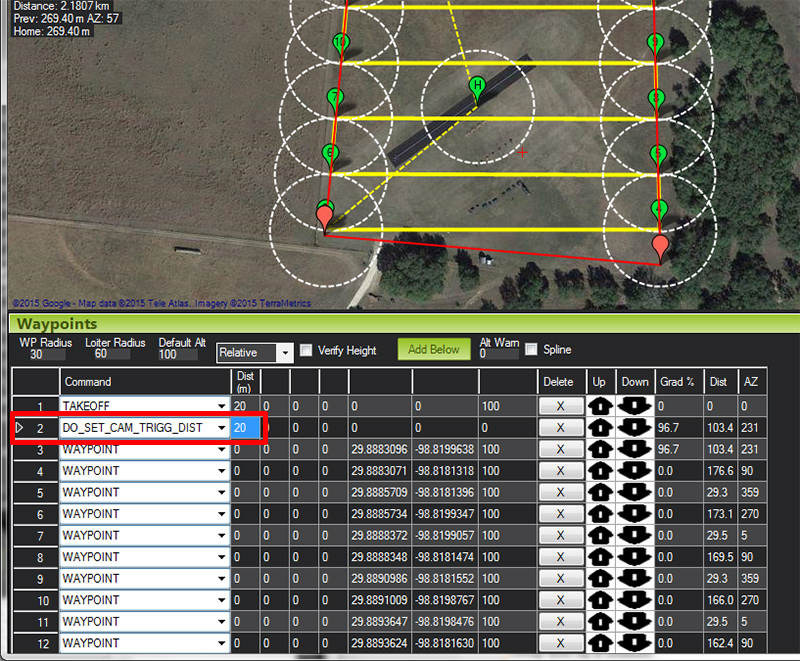
Make sure
LOG_BITMASK
is set to 655358. This will make your Pixhawk record CAM
trigger messages in its log file. You'll use the messages to help
determine the hour difference of your GoPro and GPS time.
-
Create your flight grid and add a
DO_SET_CAM_TRIGG_DIST command. Set to 20 meters. This is
just for writing a CAM message to your Pixhawk log file, not for
actually triggering your GoPro.
-
Set your GoPro to Time Lapse mode, take a
picture about every two seconds and fly your mission.
Add geotags using Mission Planner
- Create a folder on your PC and copy the .bin file from your
mission off your
Pixhawk SD card.
- Start Mission Planner > Flight Data > DataFlash Logs
tab > PX4 bin to log. Load your .bin file and save it
as a .log file.
- Copy your pictures from your GoPro to the new folder with
your log file.
- In Mission Planner select Control + F.
- Select Geo ref images.
- Select Browse Log and and select your .log
file.
- Select Browse Pictures and select your
pictures.
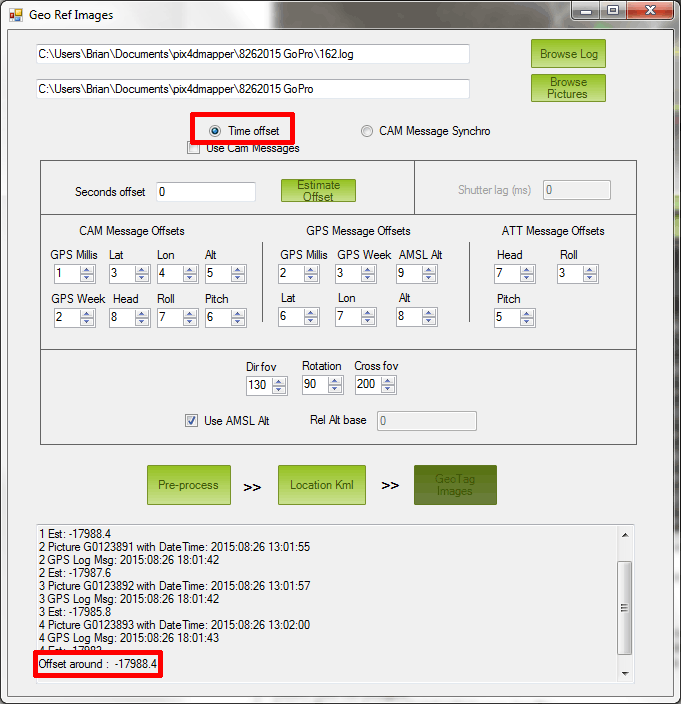
- Select Time offset, then Estimate
Offset. This example shows an offset of -17988.4.
This is the difference between the time the Pixhawk recorded
its first camera trigger message and the time stamp on the
first picture. This number is not accurate since the GoPro was
taking pictures before the UAV even took off, but it lets us know
what number to use based on the time zone difference. Minutes
and seconds on the image timestamps are already accurate, we just need to know how many hours
to offset in seconds. There are 3600 seconds per hour. 5 hours offset is
18000. The real number we need for Seconds Offset
is (negative) -18000.
| Hours |
Seconds |
| 1 |
3600 |
| 2 |
7200 |
| 23 |
82800 |
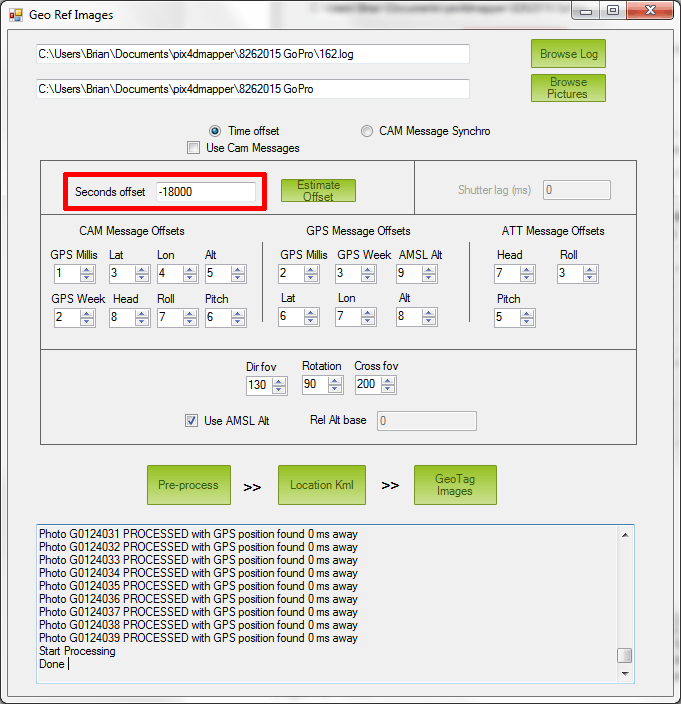
- Enter your corrected offset in the Seconds
offset box and press the Pre-Process
button.
- Press the GeoTag Images button.
- Your geotagged images will be added to a new folder named
geotagged inside the folder with the photos.
|