Overview
Do the following to build your Tuffwing 32.
- Glue the wings
- Install the electronics bay
- Install motor mount
- Tape the leading edge
- Install the winglets
- Install Velcro
- Install the servos
- Install the motor
- Install the receiver and
ESC
- Configure your
transmitter and servos
- Center of Gravity
- Launching and flying
Kit contents
- EPP wing set
- 1/8” ply motor mount set
- Control horns (2)
- Coroplast hatch
- Coroplast motor mount doubler
- Coroplast winglets (2)
- Wing spar center - 5mm x 16.5” carbon tube
- Wing spars leading edge - 5mm x 19.75” carbon tube (2)
- Elevon spars - 3 mm x 13” carbon tube (2)
- Control rod with Z bend (2)
- Control rod quick connect (2)
- Velcro set
- 2mm x 8mm motor mount screws (4)
- 15cm servo extension (1)
Additional items needed
- Medium CA. Foam safe NOT required.
-
CA activator - required! CA will just soak into EPP foam if you don't apply activator.
- 3M Extreme packing tape or Duck brand duct tape.
- Motor - NTM 28-36, 2200KV
- 50 ESC
- APC 7x4E electric propeller.
- (2) 9 gram servos such as Corona 929MG. The servo opening are
23mm x 13mm.
- Transmitter with Elevon/Delta mixing and micro receiver
- 2200 mAh 3S LiPo battery
- LiPo battery charger
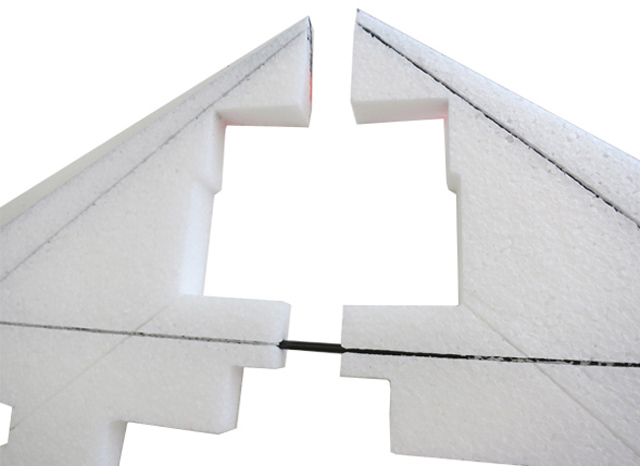
- Push the 5mm leading edge spars into the spar grooves. Leave the gap at the wing tip. Drip medium CA into the groove then spray with CA activator.
- Insert the 5mm wing center spar and slide the wing halves together until there's a ½" gap. Apply medium CA to the wing roots, then push the roots together.
- Hold roots even and spray joint with CA activator. Then drip CA into center spar groove and spray with CA activator.
- Push the 3mm elevon spars into the spar grooves and glue one side.
- Squeeze cut to 1/16" then glue the other side.
If you leave a big gap your control horns won't fit snug.
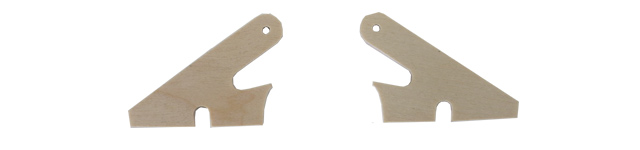
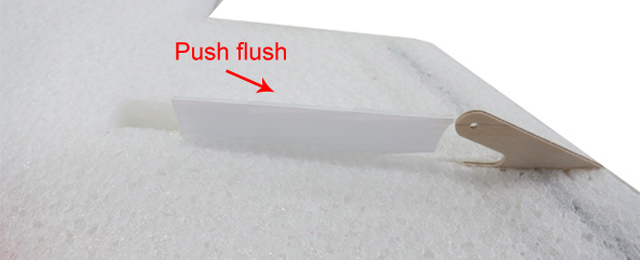
- First glue the control horns into slots.
- Then glue the coroplast cut fillers. Push flush.
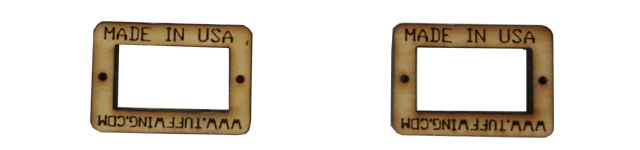
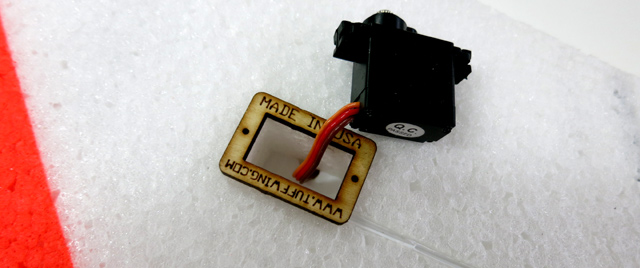
- Glue wood servo bases.
- Glue coroplast servo bottom covers. Leave gap for servo wire to exit.
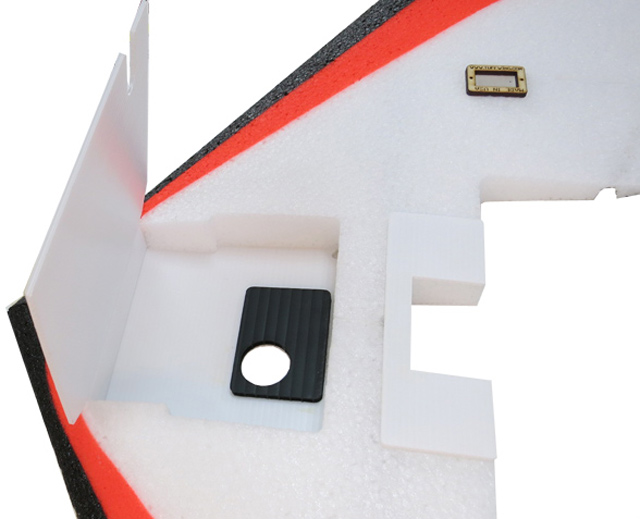
- Glue coroplast mount doubler to wing top.
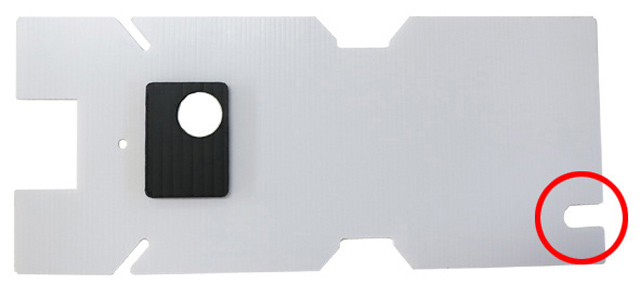
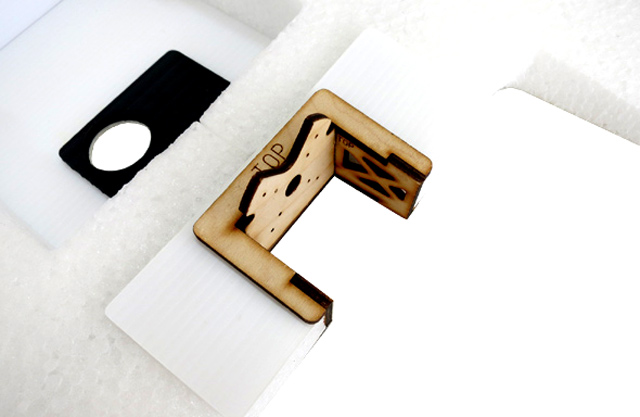
- Glue GoPro base to coroplast hatch. Note orientation of black coroplast base and location ESC wire exit.
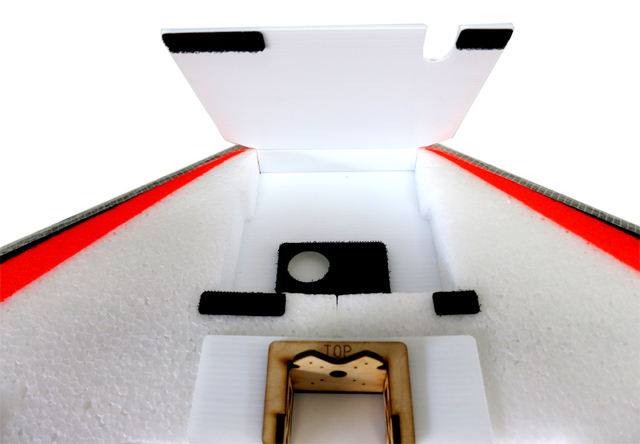
- Pre-fold hatch at the opening. Test fit to ensure the back of the
hatch aligns with the motor mount opening. Glue hatch to bottom of wing.
- Build the motor mount as shown. First glue the sides, then glue the top and bottom.
- Glue the mount to the wing. Test fit first, then apply CA quickly slide mount in place before the CA cures.
- Tape the nose with strapping tape as shown. Do the bottom first, then top.
- Tape the leading edge.
- Scuff winglet with fine sandpaper where it will contact wing. Apply glue to wing tip. Spray activator on winglet. Align bottom of
winglet with bottom of wing.
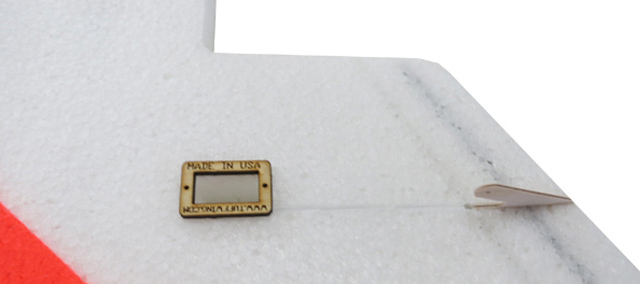
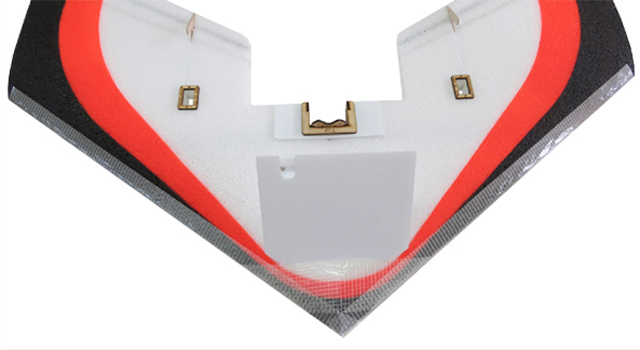
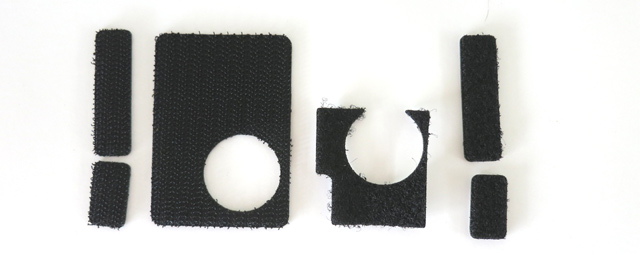
- Install Velcro hooks on bottom surfaces. Apply a bead of CA around the edge of the Velcro on the foam.
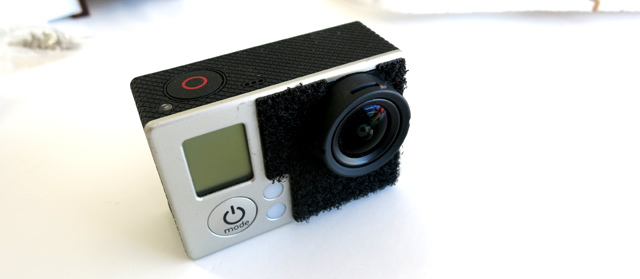
- Apply loop Velcro to the face of your GoPro.
- Feed the servo wire through the opening.
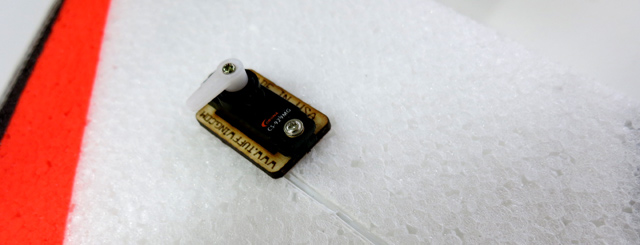
- Install the servo hardware and mount servo.
- Feed servo wire into bay and tuck into groove.
- Connect the 15cm servo extension to the right servo.
- Widen the outer servo arm hole with 1/16" drill bit.
- Install the quick connects and pushrods as shown. Tighten quick connect nut
until the threads bottom, but leave servo arm screw and quick connect screw loose.
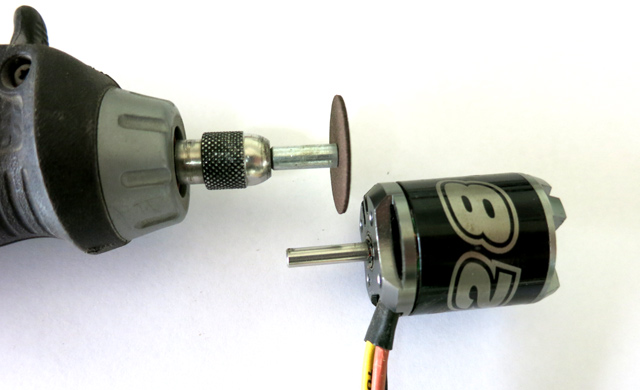
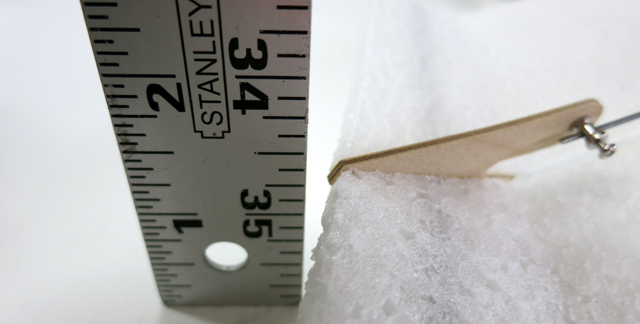
- Use a rotary tool to trim the shaft.
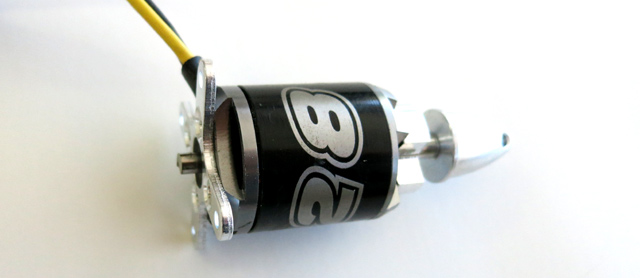
- Install the X mount and prop adapter.
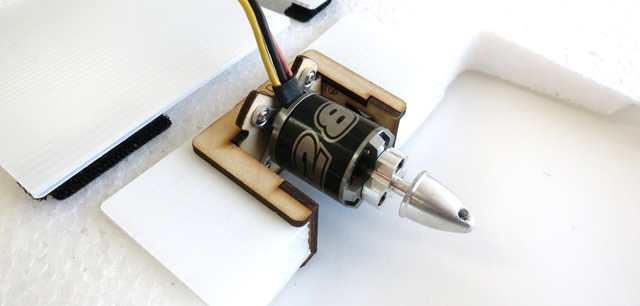
- Use the included 2mm x5mm screws to attach the motor.
- Connect the left elevon to AILE and the right elevon to
ELEV. Signal wires (white or orange) go up (near the labels).
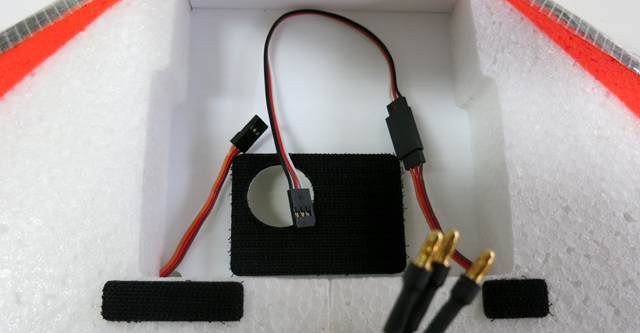
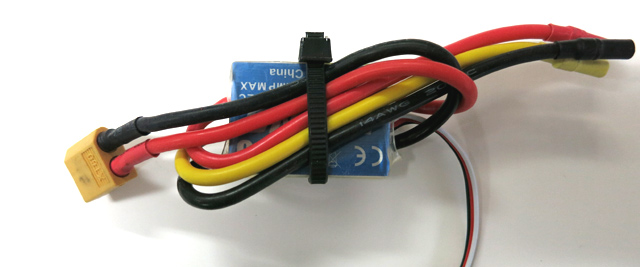
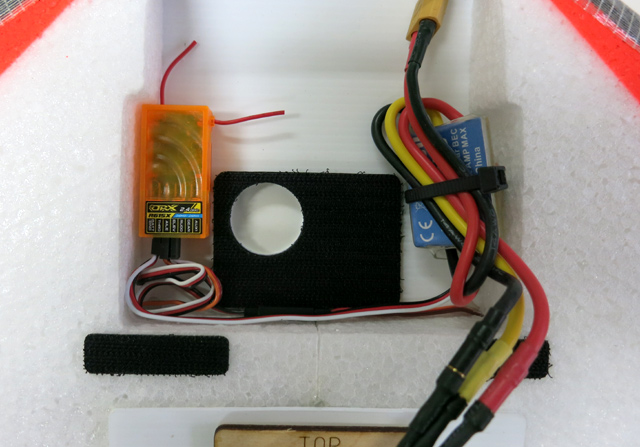
- Zip tie the ESC as shown.
- Plug the ESC servo wire into THRO. The
three motor wires can be connected in any order. Swap any
two to change motor direction.
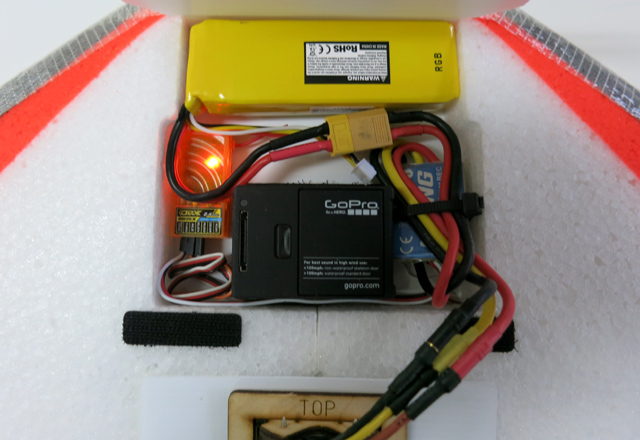
- Everything installed.
You need to set your transmitter to Elevon mode,
center your servos, set servo direction, set control throw distance, and
add exponential. These Instructions for Spektrum
DX7/DX8. Other transmitters are similar.
Bind your receiver to your transmitter and do the following:
Set your transmitter to Elevon mode
- Power on your transmitter while holding the Scroll Wheel.
- Select Find Wing Type and select Elevon.
Press the Back button to exit.
Center your servos
- Ensure your transmitter trims are centered.
- Remove the servo arms from the servos and position them so they are at a right angle from the control rod. Use thread locker and tighten servo arm screw.
- Raise elevons 1/8" up from relaxed position and tighten quick connect screw.
Set the servo direction
You can set servo direction by reversing the servos
in the transmitter setup and/or swapping the servo plugs on the receiver
between AILE and ELEV. Every
servo setup is different. The desired behavior is:
- Move Right stick right: Right elevon up, left elevon down
- Move Right stick left: Left elevon up, right elevon down
- Move Right stick forward: Both elevons down
- Move Right stick back: Both elevons up
Do the following to reverse servo direction using
the transmitter setup:
- Press the Scroll Wheel to enter the Function List > Servo Setup.
- High light Travel and change it to
Reverse.
- Scroll to Throttle and change it to
Right Ail or Left Ail.
- Scroll to NOR REV and select the
Rectangle to reverse the servos.
If necessary, swap servo plugs and use transmitter servo reversing to get the behavior.
Set the control throw distance
The Elevons should travel 3/8 inch up and 3/8 inch
down when moving the Right stick right to left. Measure
the control horn movement with a ruler and do the following:
- Press the Scroll Wheel to enter the Function List > Servo Setup.
- High light Throttle and change it to
Right Ail.
- Select 100% 100%. Move Right stick left to
right and change the percent until Right Ail move 3/8 inch up and 3/8
inch down.
- Do the same for Left Ail.
Add exponential
You can make your Tuffwing 32 fly smoother by
adding Exponential. This slows servo movement while the transmitter
sticks are near the center and gradually increases movement as the stick
nears the end.
-
Press the Scroll Wheel to enter the Function List >
D/R and Expo.
-
Scroll to Chan: and select Aileron.
-
Scroll to EXPO and change to 30 30.
-
Scroll back to Chan: and change it to
Elevator.
-
Scroll to EXPO and change to 30 30.
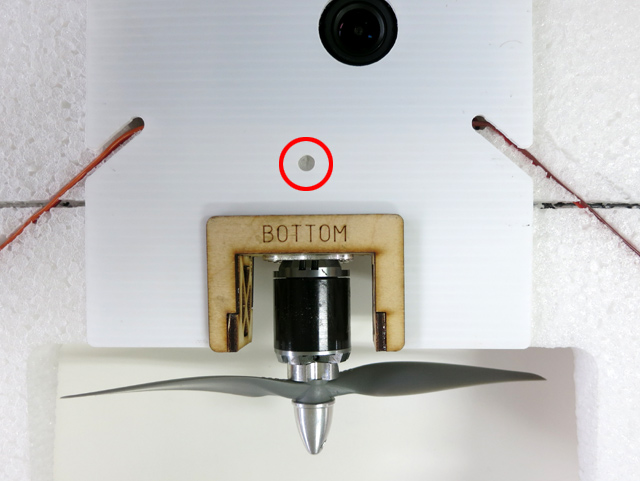
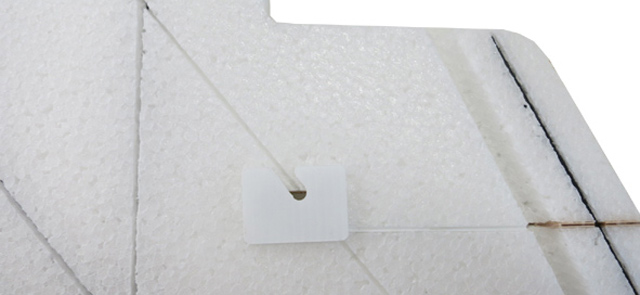
There is balance hole on the bottom of the CoroPlast hatch.
Balance the plane on your finger. As long as the plane balances or falls forward you’re good. Tail heavy will be nearly impossible to fly. Nose heavy is fine.
The side launch is the easiest way to get your Tuffwing in the air. Add about ¼ throttle and throw it at a 45º angle like a Frisbee, just not with a twist of the wrist at the end. You may want to have a friend launch it until you get it trimmed.
|