|
Out dated - Use
Servo signal method.
Overview
Pixhawk based UAVs can automatically take pictures at a set distance using GPS
distances or points.
In order to do so you must configure the Pixhawk, Install
CHDK on a
compatible Canon Powershot camera,
install
KAP UAV Exposure Control Script, and connect the Pixhawk to the camera
with a trigger cable.
Configure the Pixhawk
-
Open Mission Planner and connect to your Pixhawk.
-
Select Config/Tuning > Full Parameter
List and set the following:
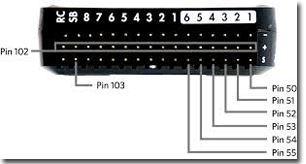
- CAM_TRIGG_TYPE (1)
- RELAY_PIN (50-55) Use the image below to pick an open relay
pin for the camera trigger cable.
-
Press the Write Params button.
Install CHDK on a Canon Powershot camera.
CHDK is free, non permanent software that runs in
addition to the firmware on certain Canon cameras. Among other things,
it allows you to run scripts that can remotely trigger the camera by
sending a 5 volt pulse through a USB cable. It is
installed on the camera's SD memory card, so no modifications are made to
the camera. The easiest way to install CHDK is by using a program called
Stick.
-
Downlaod Stick.
-
Follow Stick's instructions to install CHDK on your camera's SD
memory card.
-
Follow the CHDK
instructions for loading and using CHDK on your camera.
Install and configure KAP UAV Exposure Control Script on your
camera
The KAP Exposure Control Lua script runs under CHDK
and automatically controls shutter speed, aperture, ND filter, and ISO
settings so as to maintain the fast shutter speeds needed in aerial
photography. Additionally it allows you to trigger your camera by
sending a 5 volt pulse to the camera's usb port. Do the following to
install and configure KAP UAV Exposure Control Script:
-
Download KAP UAV Exposure Control Script. (kap_uav.lua)
-
Copy kap_uav.lua into your (SD Card:)\CHDK\SCRIPTS.
-
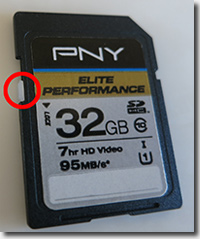
Lock your SD card, insert it into your camera, and turn your camera on.
-
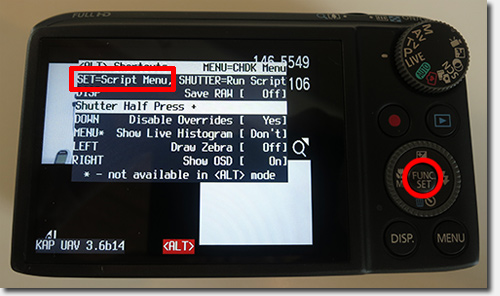
Press the Play button.
-
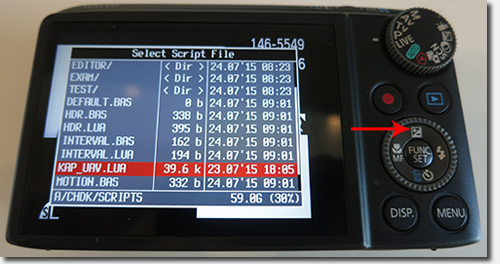
Press the FUNC SET button to select the Script Menu.
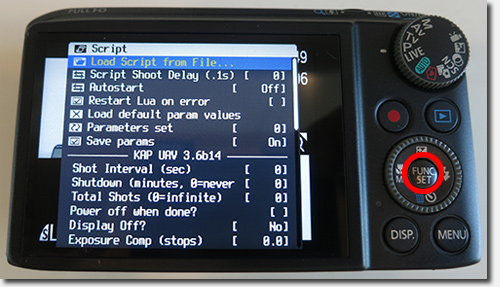
-
Press the FUNC SET button to Load
Script from File.
- Select KAP_UAV.LUA using the
Outer button and FUNC SET
button.
- Set Shot Interval (sec) to Fast
.
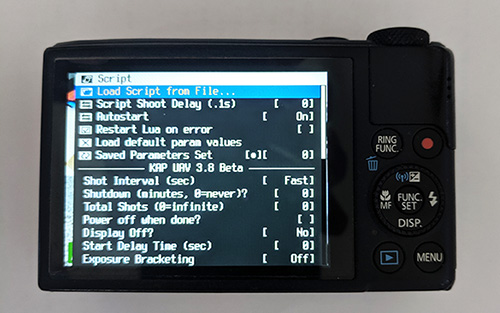
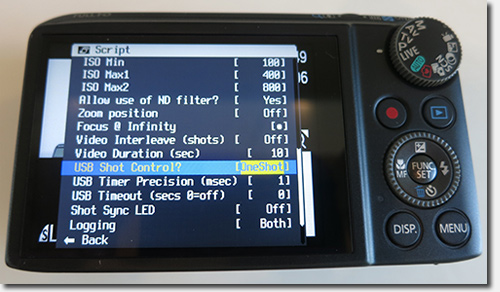
- Use the Outer button to move down the list
until you select USB Shot Control? Use the
FUNC SET button to rotate options until
OneShot is highlighted. Press the Menu button to exit the KAP_UAV.lua options.
- Half Press the shutter to start KAP_UAV.lua.
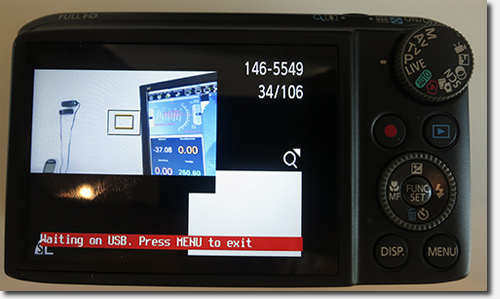
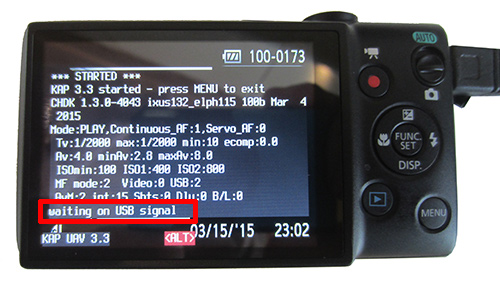
- Your camera is ready when you see Waiting on USB.
- The default exposure values should work on a sunny day. If
necessary, use the
KAP UAV Exposure Control Script documentation to
modify
exposure values.
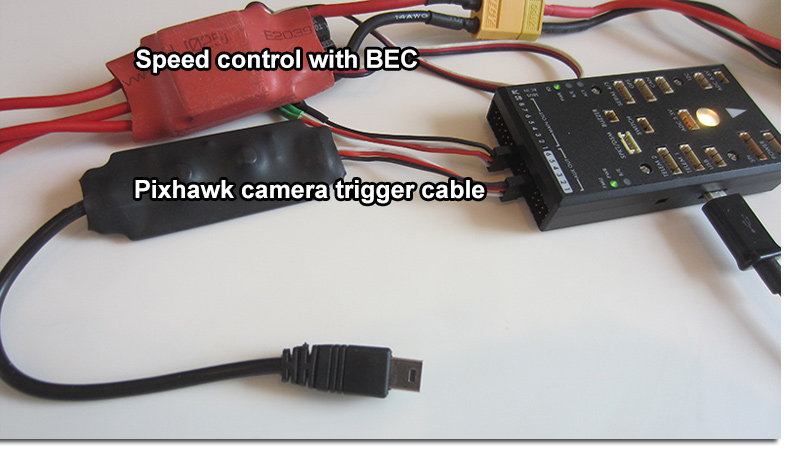
Connect the camera trigger cable
A special
Pixhawk
camera cable is required to trigger your Canon camera. As your UAV
flies past predetermined points, the Pixhawk will provide a pulse to the
Aux Out pin specified by the RELAY_PIN parameter.
Do the following to
verify your system is
working:
-
Connect the servo style connector from
Pixhawk
camera cable the to AUX OUT 5 on the back of your Pixhawk.
Note! the Pixhawk
does not provide power to the AUX OUT pins. You must provide 5 volts
to the AUX OUT pins by plugging in an ESC with a Battery Eliminator
Circuit (BEC) or a
Universal Battery Eliminator Circuit (UBEC) into any open pin
set. Read here to determine if you need a BEC.
- Connect the mini USB connector from the
Pixhawk
camera cable to the USB port on your Canon camera.
- Turn on your camera with CHDK and start the
kap_uav.lua script
so that waiting on USB signal is displayed.
- Start Mission Planner, Connect to your Pixhawk and go to the
Flight Data screen.
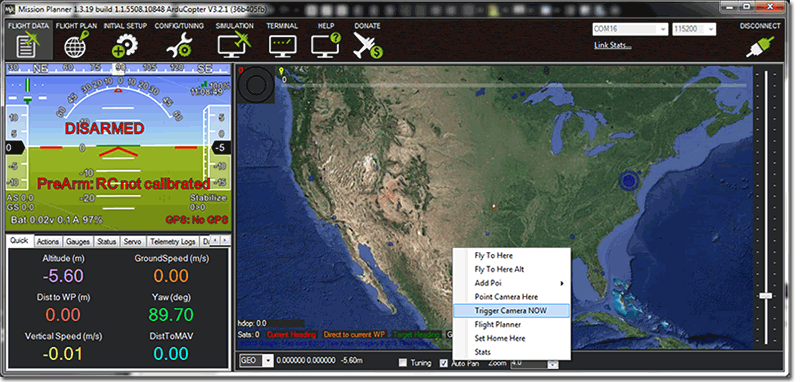
- Right-click on the map and select Trigger Camera NOW.
If everything is setup correctly your Pixhawk will trigger the Canon
camera to take a picture and is capable of triggering pictures using
GPS distance.
Hint: Make sure Review is
turned off your Canon camera's menu. Canon camera > Menu
button> Review "off".
|