Overview
Do the following to process and validate a 3D map
georeferenced with Reach GPS data.
About the data
- 112 photos acquired with a
Tuffwing UAV Mapper,
Reach GPS,
Tuffwing Reach integration cable.
- Sony Nex 5T with Sony 16mm lens.
- Altitude: 100m.
- Average Ground Sampling Distance (GSD) 2.82 cm / 1.11
- Area Covered 0.1139 km2 / 11.3916 ha / 0.044 sq. mi. /
28.1638 acres.
- Camera triggered by a Pixhawk.
- No communication between the Reach and Pixhawk. It just goes
along for the ride and collects picture locations.
- Picture locations corrected after the flight using RTKLIB.
- Here's the Pix4D Quality Report.
Create a New Project in Pix4D
- Download
the data (507 MB). Contents:
- Images: 112
- Geotag file: Geotag.Flight1b.txt
- Ground Control Point file: GCP.txt
-
Create a new 3D Map project and add the photos.
-
Select From File > File Format > L,L,A.
-
Brows to Geotag.Flight1b.txt and press the
OK button.
-
Select Custom Geolocation Accuracy.
-
Right click in the Acuracy Horz [m] box and
change the value to .05. Do the same for Vert [m].
-
Click OK.
-
Process the 3D Map.
Import the GCP file
You can validate the accuracy of the 3D map using
the included ground control point file.
- Set the GCP coordinate system
- Go to Project > GCP/MTP Manager. Select Edit > Advanced Coordinate Options > From List >>then select WGS 84
- Import the GCP file.
- Select Import GCPs. Browse to GCP.txt.
- Change Type from 3D GCP to Check Point.
- Press OK.
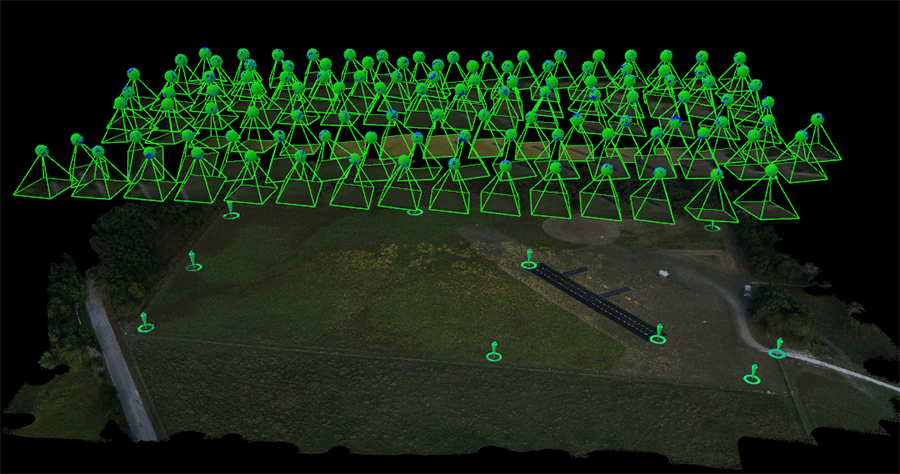
Mark the Check Points in the rayCloud editor
- Select a Check Point from the Tie Points list.
- Click on the center of the square target in the Images box. Repeat on 6 photos.
- Click the Apply button.
- So the same for all Check Points.
- Select Process > Rematch and Reoptimize.
- Select Generate Quality Report.
|