Overview
You can learn the basics of Reach PPK processing by
setting one Reach GPS on a Base location [known or unknown] and walking with a second
Reach GPS as your Rover. This tutorial is the same process you will use for precise camera
positions even though there is no UAV, camera, or known base location
necessary.
Requirements
- Two Emlid Reach receivers (M or RS) with
firmware installed. No additional settings are required for your
Reach units. You will only need the raw logs that are automatically
created as soon as you power your Reach receiver.
-
Battery power for your Reach receiver.
-
Emlid RTKLIB software: https://docs.emlid.com/reach/common/tutorials/gps-post-processing/
Collect data
- Place one Reach on a stationary location [Base]
and power it. You do not need
to know the precise location. It will start accumulating raw GPS
data as soon as you power it.
- Power your second Reach [Rover], wait for the LED to turn green,
then walk around with it.
-
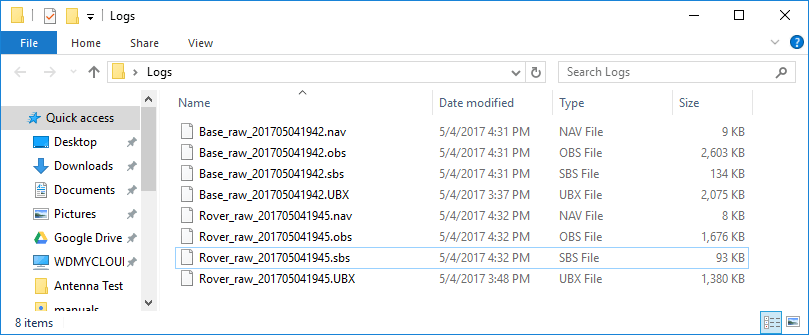
Connect to your Reach Rover and Base and download the
Raw data [UBX] files that accumulated during the test.
Append "Rover" and "Base" to the beginning of the file names.
Convert the Raw files to RINEX
- Start RTKCONV [rtkconv_emlid_b27.exe]
- Use the ... button to select your raw Base [UBX] file.
RTKCONV will automatically set the output path for the RINEX files
to the same folder as the .ubx file.
- Select the Options button.
- Set RINEX version to 3.03.
- Click OK.
- Click Convert.
- Do the same for the raw Rover files.
- Now you should have these files.
Correct your Rover positions
- Start RTKPOST [rtkpost_emlid_b27.exe]
- Use the RINEX OBS: ROVER ... button to select your Rover .obs
file.
- Use the RINEX OBS: Base Station ... button to select your Base
.obs file.
- Limit the amount of data you process and avoid "Memory
Error" problems by selecting Time Start. Note the
format of the Rover file name. [GPS Time] 201705041945. That is Year
2017. Month 05, Day 04, Time 1945. Pick a time shortly before.
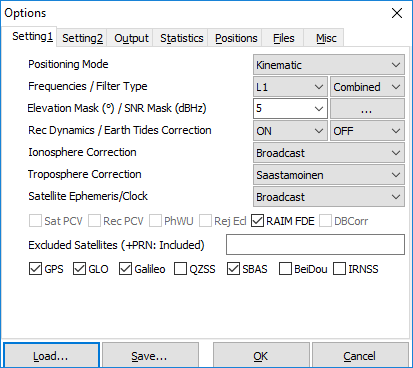
- Select the Options button
.
- Select the Load button and open RoverCorrectionConfig.conf.
- Select the Execute button.
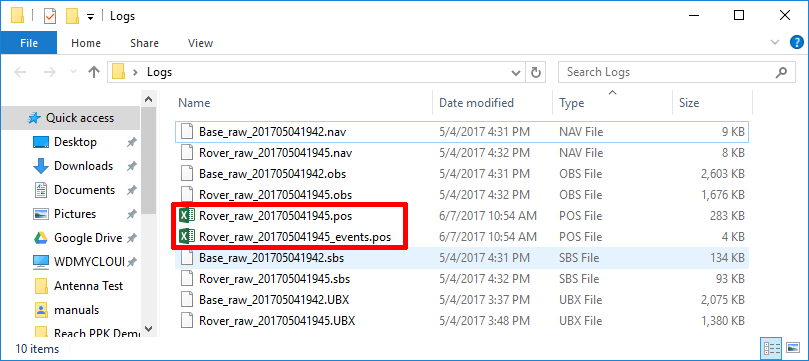
- Now you should have .pos files in your folder.
- Rover_###.pos is the corrected, moving path of your Rover.
- Rover_###_events.pos is
position of the camera events [precision geotags]. This file will be
empty in this test unless you had a
camera connected
and were taking pictures while you were walking with your Reach
Rover.
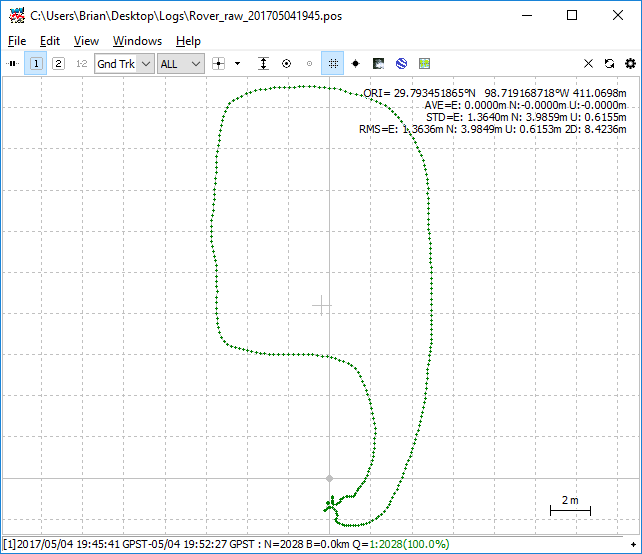
Plot your Rover path
- Start RTKPLOT [rtkplot.exe].
- Go to File > Open Solution 1 and select your Rover_###.pos
file.
- If you had a camera connected you can Open Rover_###_events.pos
as Solution 2. You can toggle between the two by using the
1 2 buttons on the top left.
Notes
- If you know your Base position you can specify it in RTKPOST >
Options > Positions > Base Station.
- How to use
Reach data to geotag images.
|